Arm
Arm overview
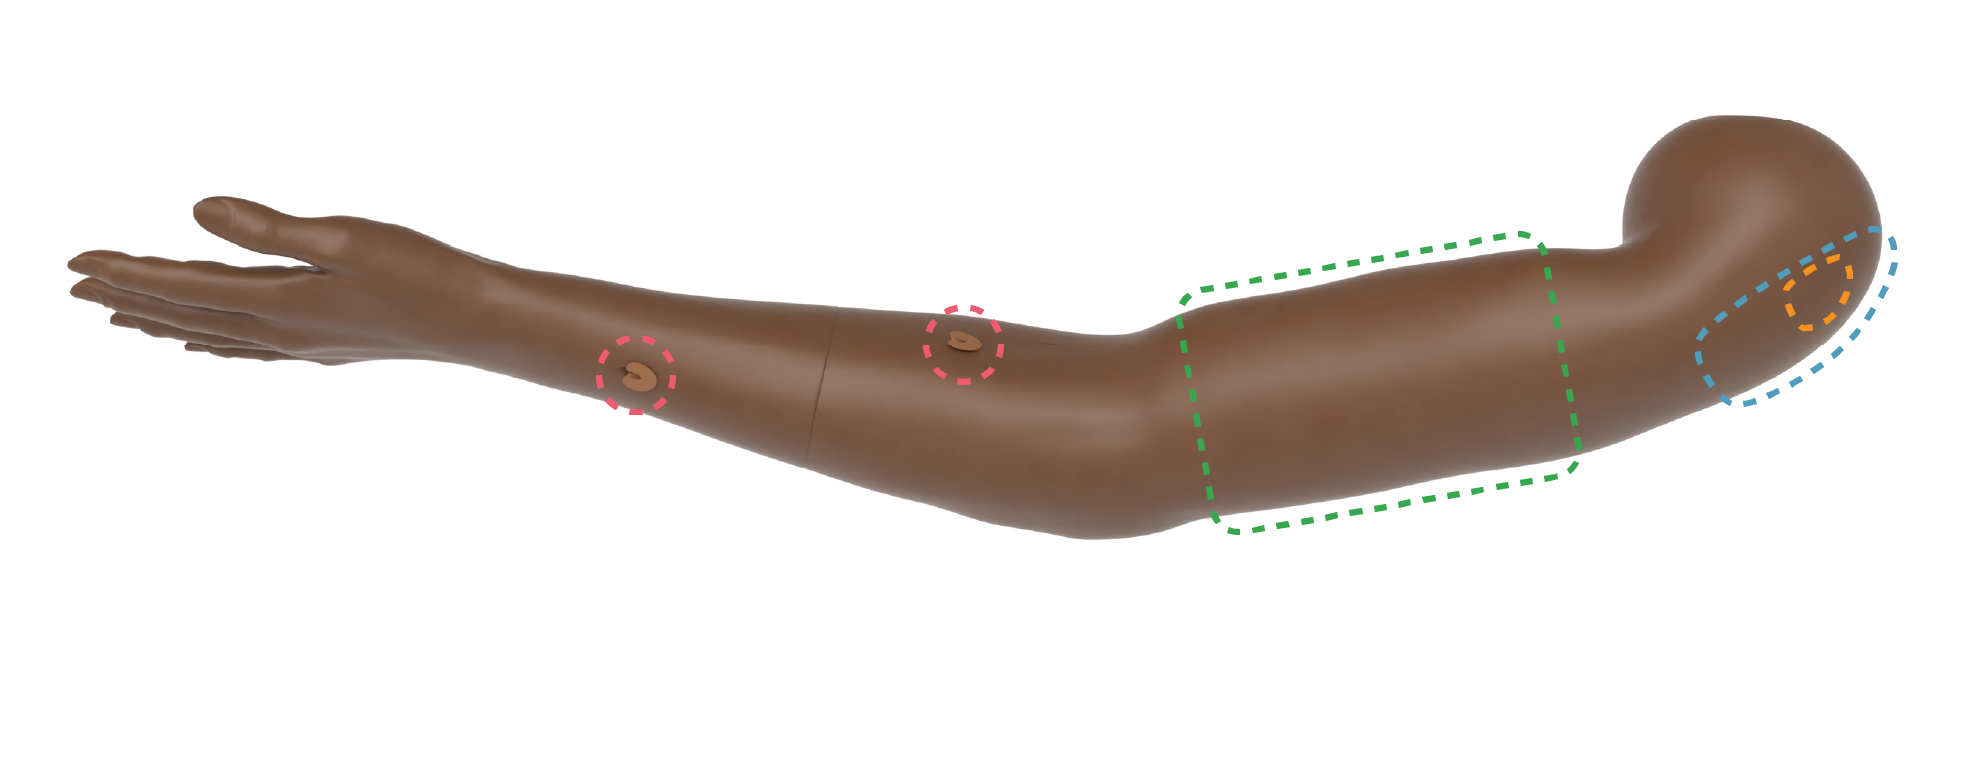
 IV ports
 Blood pressure site
 Intramuscular injection
 Intraosseous injection
Locking the elbows
The Patient Simulator's elbows can be locked to add stability when placed in an all-fours position.
Check that the elbow joint lock is unlocked and that the elbow can move freely.
Bend the elbow to the desired position.
Turn the elbow joint lock 90 degrees to lock the elbow.
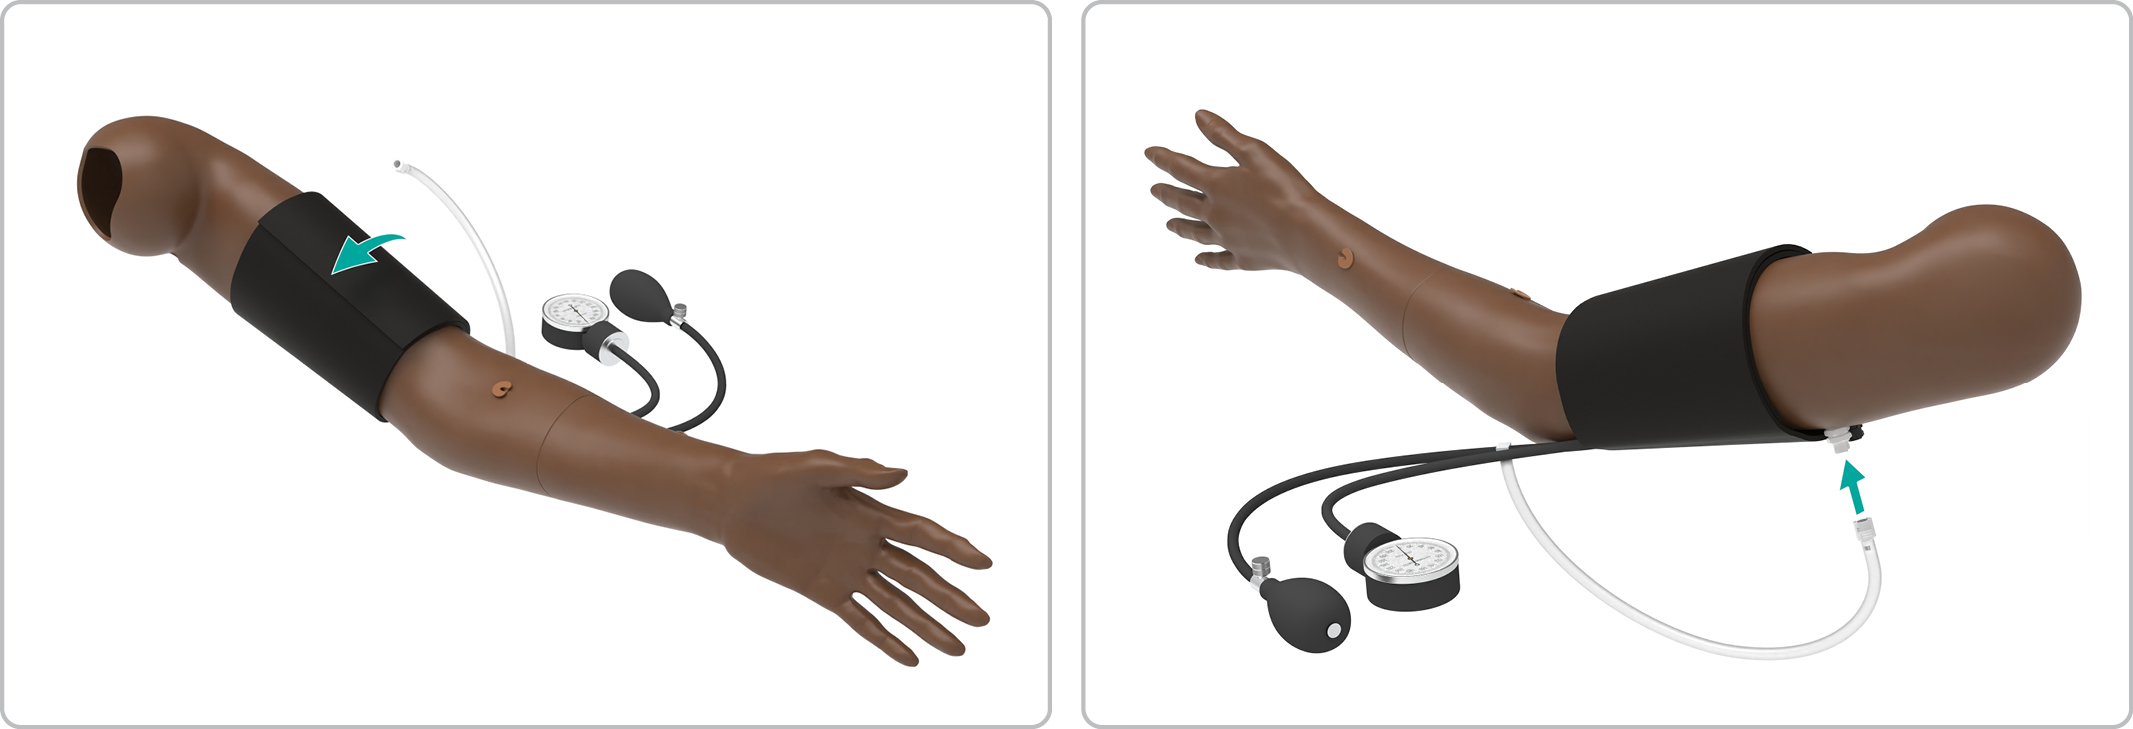
Attaching the blood pressure (BP) cuff
Attach the BP cuff to the arm.
Connect the white connector exiting the cuff to the white connector exiting the back of the Patient Simulator's upper arm.
NOTES
See the LLEAP help files for complete blood pressure measurements, operating information and calibration instructions.
Only use the Blood Pressure cuff supplied with MamaAnne
IV arm
MamaAnne arms features two pre-ported bilateral radial and antecubital IV ports. Both arms support training for IV drug or fluid administration.
Setting up an Intravenous (IV)
IV cannulation can be performed.
NOTE
Only use purified water (distilled) to simulate IV drugs. This prevents clogging of the system.
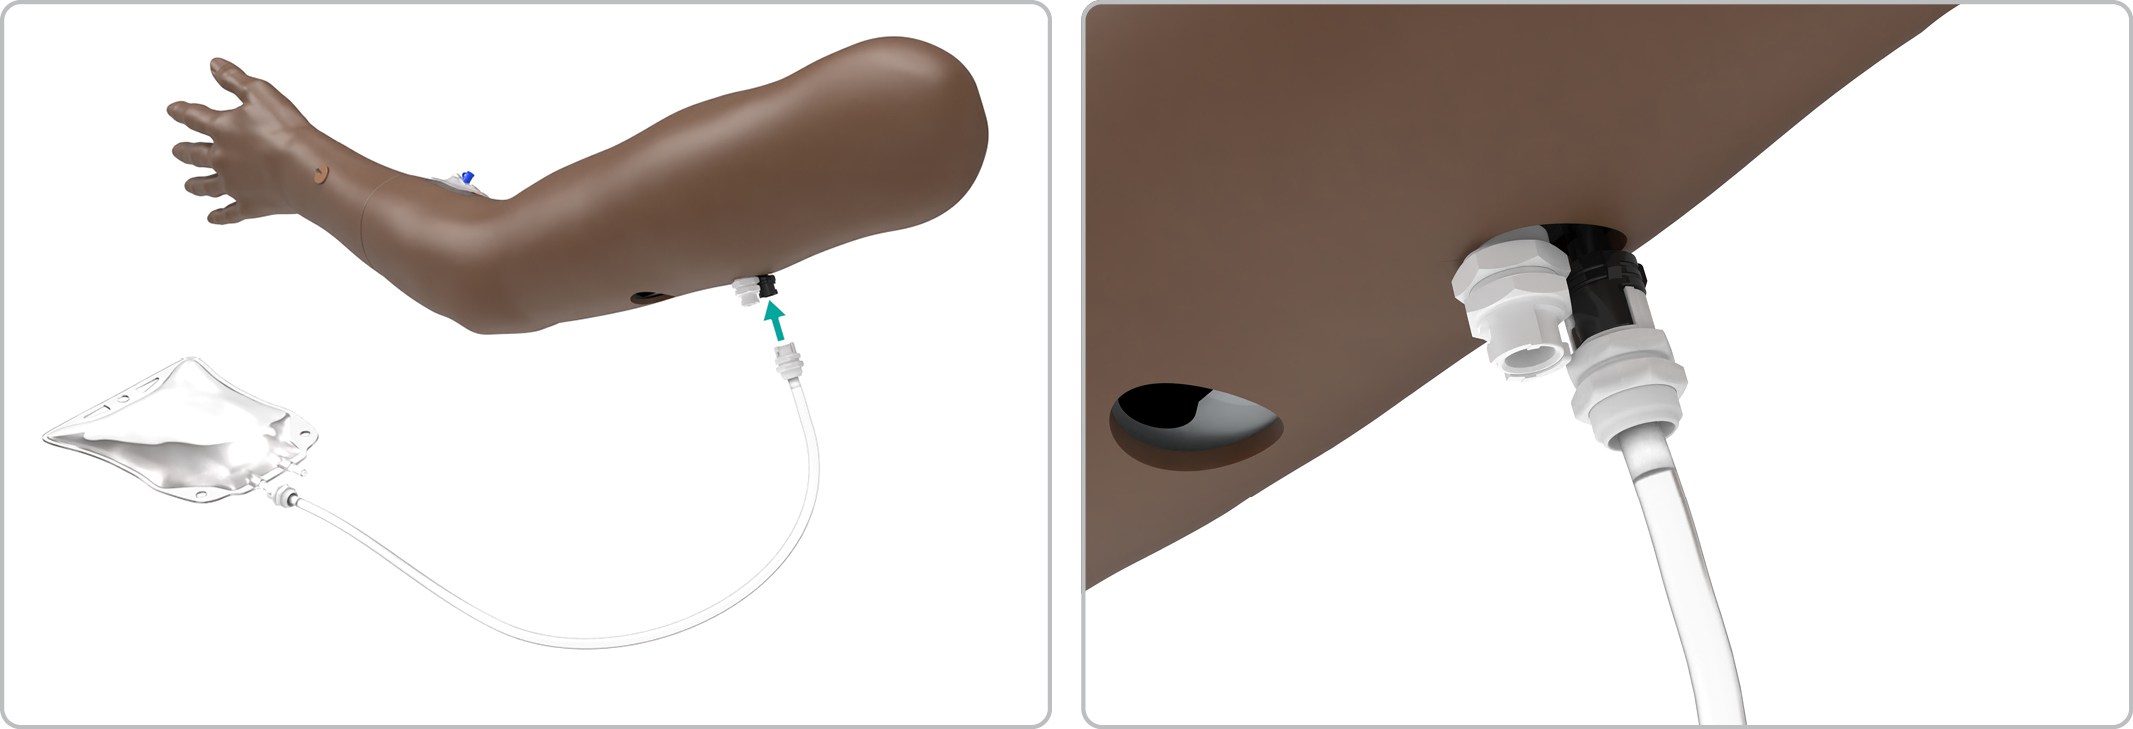
Connecting a drain bag
The IV fluid system is an open system. IV fluids are drained as they are administered.
Connect an IV overflow tube and reservoir bag to the IV fluid drain port under the Patient Simulator’s arm.
Excess fluid will drain into the reservoir bag during the simulation.
NOTE
The white port is for the BP cuff, the black port is for the IV drain bag.
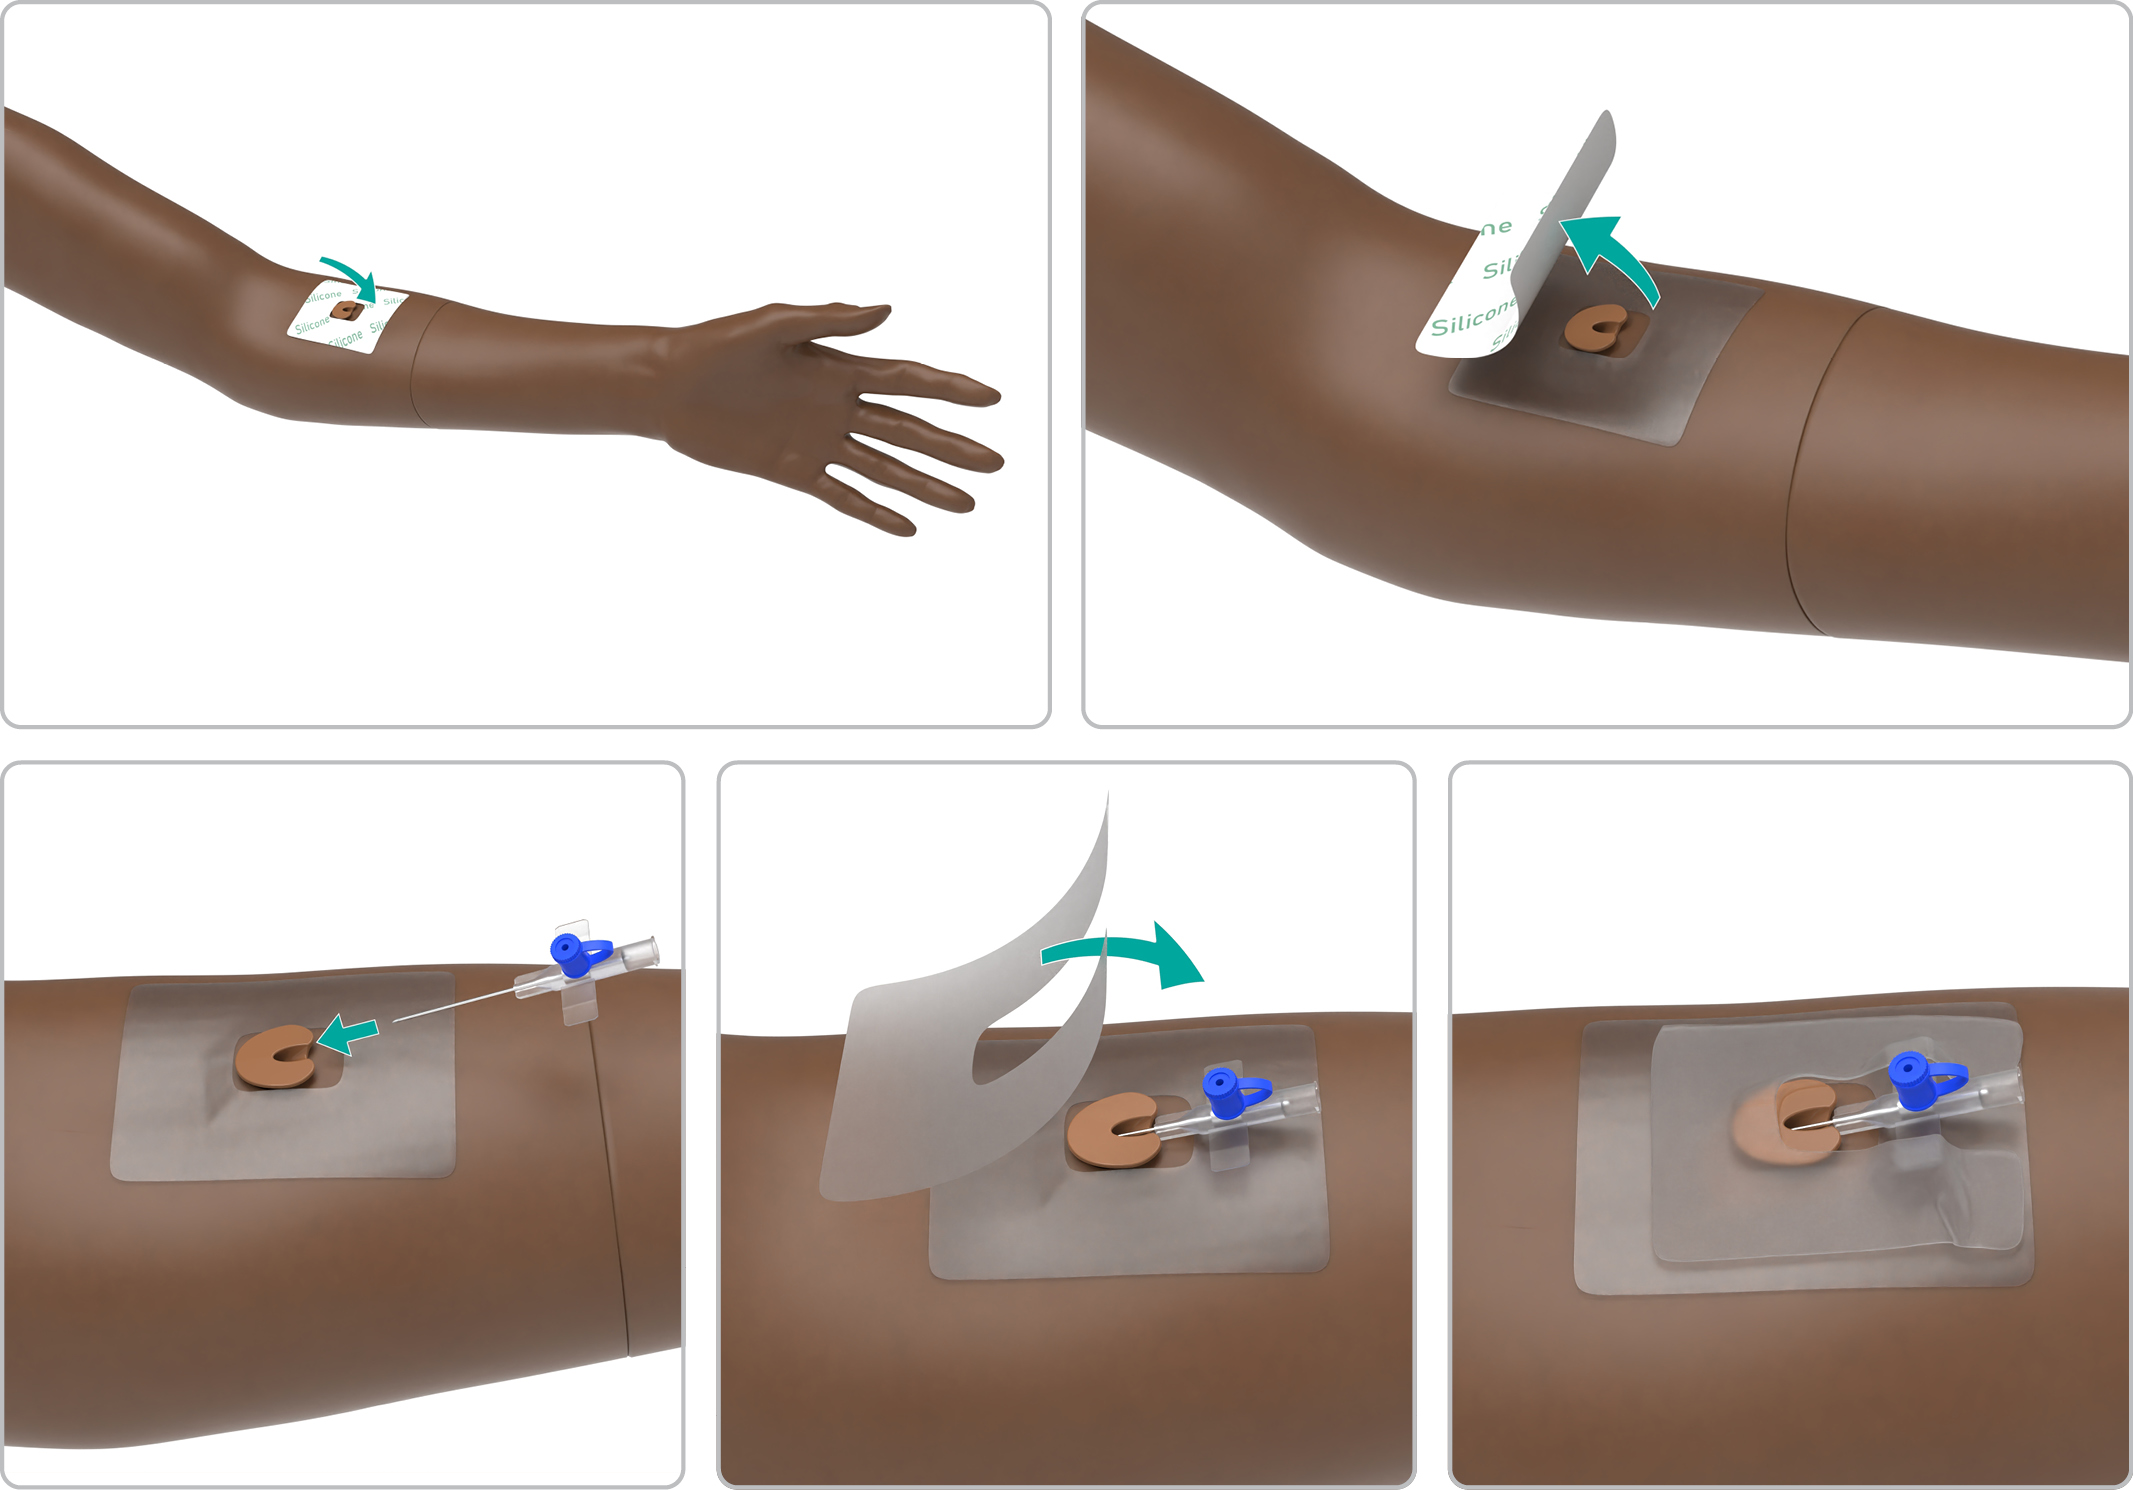
Preparing an IV with a silicone dressing base
For better adhesion of the IV dressings, position the silicone dressing base onto the arm skin.
Place the dressing.
Peel off the adhesive.
Insert the IV cannula.
Connect the tubes (luer lock) to the cannula and drain bag.
Secure the IV area with tape.
NOTES
The silicone dressing base can be used multiple times, and does not need to be replaced after each use.
An IV drip can be set up to administer fluids into the cannula.
Intrasmuscular (IM) injection
Intramuscular (IM) injection can be simulated in both deltoid arm areas and the right thigh.
NOTES
The Arm IM pads absorbs up to 10 ml of fluid.
The Thigh IM pad absorbs up to 15 ml of fluid.
To dry or replace the pad(s) refer to Maintaining IM Pads & Sheets.
Intraosseous (IO) injection
IO simulation with needle insertion is possible through the humeral bone.
CAUTIONS
Incorrect use of larger devices can damage the IO bone and/or internal components. The smaller size is recommended.
Do not inject fluids into the pads unless approved IO modules with fluid outlets are in place.
NOTES
Ensure that the IO bone has not already been pierced or used.
To repair and replace the IO bone refer to Replacing the arm IO bone.