Accessories
Trauma modules
Trauma modules can be fitted to the Patient Simulator to simulate bleeding patient cases.

After the simulation is complete, leave the trauma modules connected, and clean according to the instructions in Cleaning the Blood System.
NOTES
The SimMan CC arm adapter kit is required to connect the trauma arm modules.
There will be no automatic non-invasive blood pressure functionality on the right arm when it is used with one of the left trauma arms.
Attaching trauma arm
Before starting, follow the Open the torso skin procedure.
Move the stomach foam carefully to one side to avoid pulling on connecting tubes and cables.
Assemble the adapter screw as shown.

Thread the adapter screw to the arm adapter.

Insert the arm into the shoulder bracket.

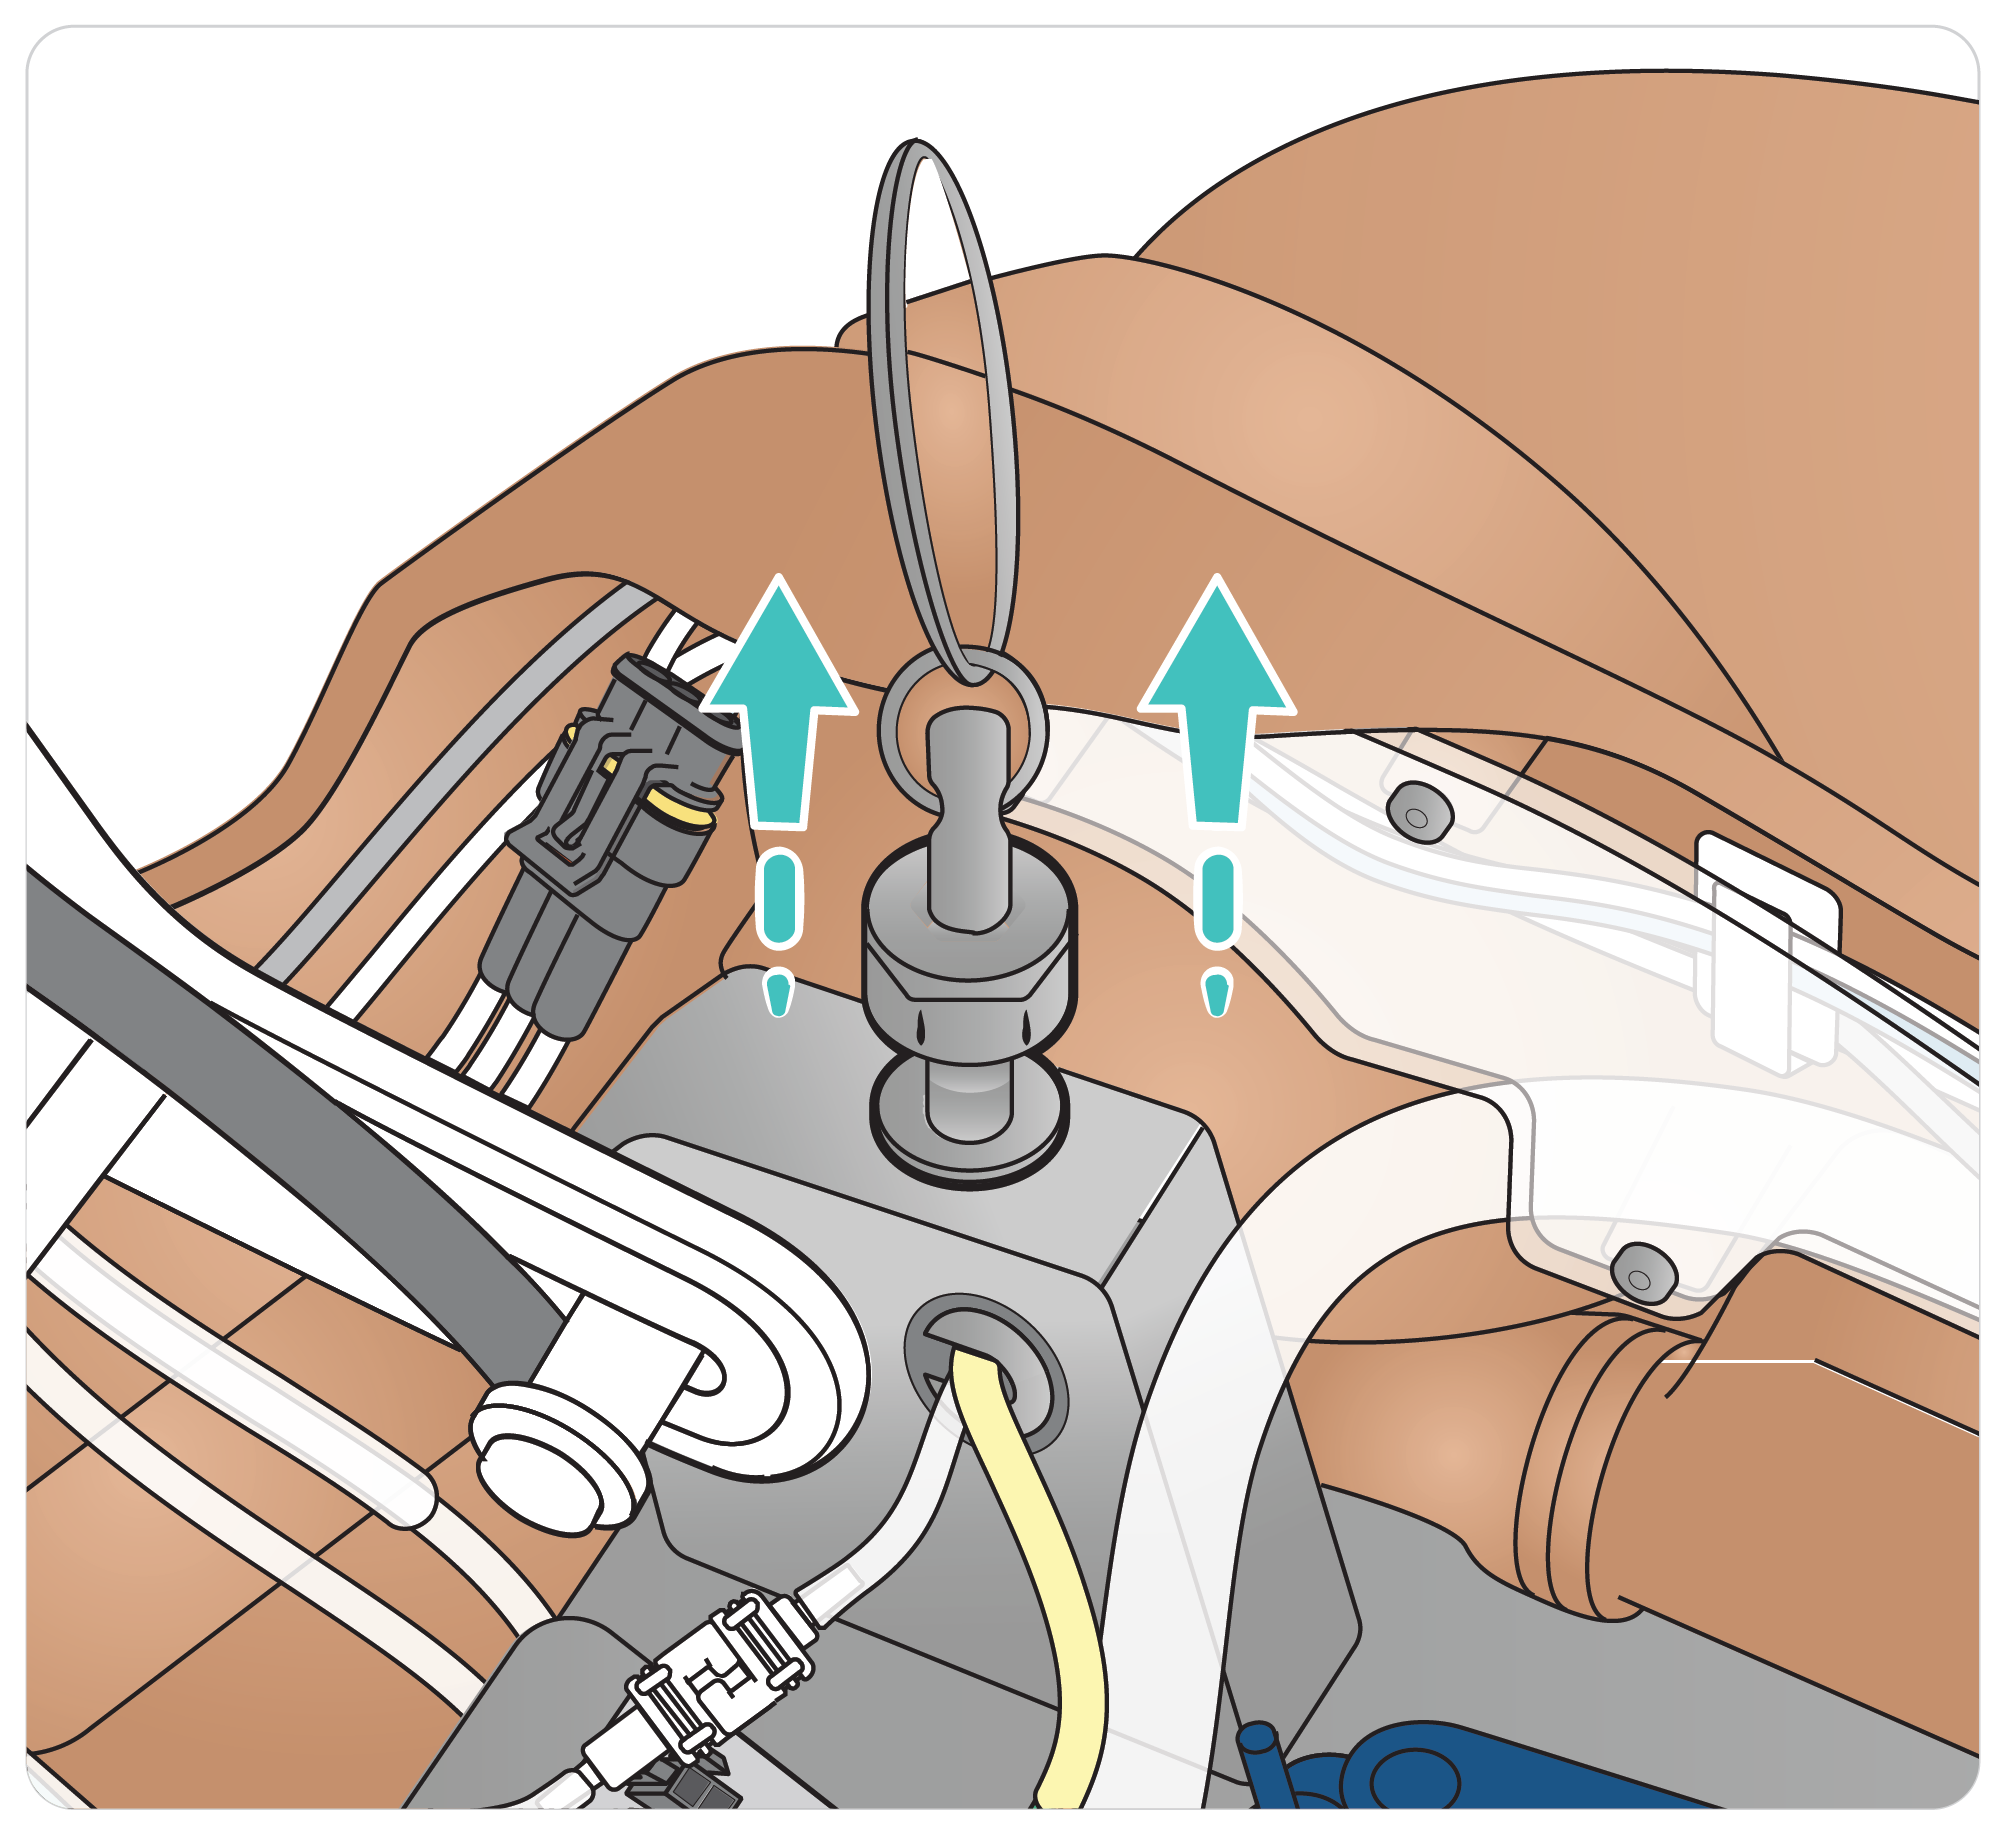
a. Loosen the arm bolt to insert the arm.
b. Pull the bolt up during inserstion then release to secure the arm.

Attach the tube to the desired blood port.

Tighten the adapter to adjust the gap between the arm and manikin.

CAUTION
Do not over rotate arm. Over rotating the arm may cause the red vinyl tubing to disconnect.
Attaching the trauma left leg

Insert the trauma leg into the leg socket.
Insert the thumb lock pin, ensuring the leg is properly fixed into place.
Connect the cables and tube.